Military simulation, commonly known as MilSim, has become one of the most immersive styles of airsoft gameplay. Unlike casual matches, MilSim events focus on realism, teamwork, and authentic tactical gear setups. Players often replicate real-world military units or build loadouts designed for specific roles such as rifleman, scout, or support gunner.
However, many newcomers assume that creating a professional-looking MilSim loadout requires a huge budget. In reality, it is entirely possible to build a convincing and functional setup without spending a fortune. By prioritizing essential gear and making smart purchasing decisions, players can achieve a professional look while staying within a reasonable budget.
Here is a step-by-step guide to building an effective MilSim loadout without overspending.
Step 1: Choose a Clear Loadout Theme
The first step in building any MilSim kit is deciding on a theme. A theme gives your gear a sense of authenticity and helps you avoid buying random items that do not match.
Popular beginner themes include:
- Modern infantry rifleman
- Special operations-inspired setups
- Recon or scout roles
- Lightweight urban combat kits
Choosing a clear theme makes it easier to select compatible gear and maintain a cohesive appearance. It also prevents unnecessary spending on items that do not fit your intended role.
Step 2: Start With a Reliable Primary Airsoft Rifle
Your primary rifle is the centerpiece of your loadout, so it should be the first major purchase. Reliability and durability are far more important than cosmetic upgrades at this stage.
Many beginners start by browsing a wide range of airsoft guns to find a model that fits their play style and budget. Entry-level electric rifles (AEGs) are especially popular because they offer consistent performance, easy maintenance, and versatility across different game environments.
When choosing your rifle, focus on:
- Reliability and build quality
- Battery compatibility
- Magazine availability
- Ease of upgrading in the future
A dependable rifle ensures you can participate confidently in both casual games and longer MilSim events.
Step 3: Pick the Right Uniform and Camouflage
A good MilSim loadout starts with the right clothing. The goal is not to buy the most expensive uniform but to choose camouflage that matches your environment and theme.
Budget-friendly options often include:
- Combat shirts or tactical tops
- Durable cargo or combat trousers
- Camouflage patterns suitable for your local terrain
Common patterns used in MilSim include woodland, multicam, desert, and urban styles. Matching your camouflage to the environment improves both realism and practical concealment.
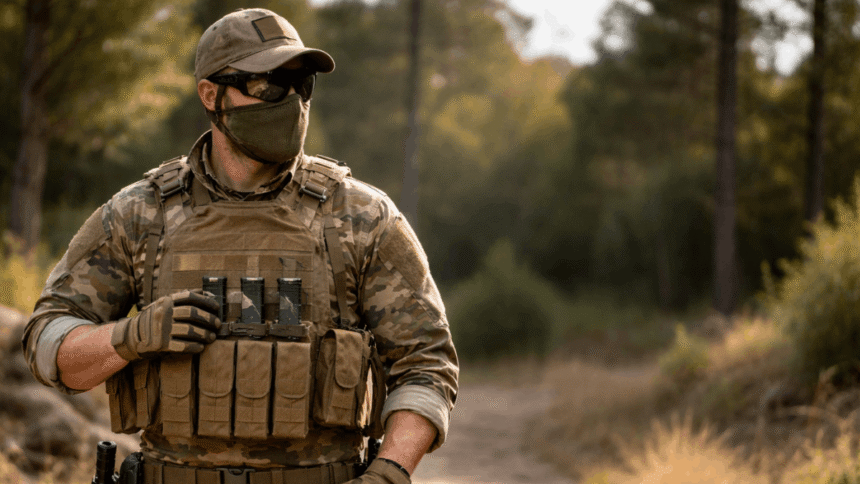
Step 4: Invest in a Basic Chest Rig or Plate Carrier
Carrying your magazines and equipment efficiently is essential during longer games. A chest rig or plate carrier provides easy access to gear while distributing weight comfortably.
For budget builds, a lightweight chest rig is often the best starting option because it is:
- Affordable
- Comfortable for long sessions
- Easy to customize with pouches
Look for rigs that include magazine pouches and small utility compartments so you can carry essential items without adding unnecessary gear.
Step 5: Add Essential Accessories Only
It is easy to overspend on accessories when building a MilSim kit. Instead of buying everything at once, focus on the essentials first.
Core accessories typically include:
- Extra magazines
- A speedloader
- A sling for your rifle
- Spare batteries for electric rifles
These items directly improve gameplay and reliability without dramatically increasing the cost of your loadout.
Step 6: Priorities Protective Equipment
Safety gear should always be part of your budget planning. Even the most impressive loadout is incomplete without proper protection.
Essential protective gear includes:
- Full-seal eye protection
- Face protection or mesh mask
- Gloves for hand protection
These items protect you during gameplay and ensure you meet safety requirements at most airsoft fields.
Step 7: Choose Practical Footwear
Footwear can make or break your experience during MilSim events, which often involve long hours of movement across rough terrain.
Instead of expensive tactical boots, many players start with durable hiking boots. These provide:
- Strong ankle support
- Comfortable cushioning
- Reliable traction on outdoor surfaces
Good footwear helps prevent fatigue and injuries during longer games.
Step 8: Upgrade Gradually Over Time
One of the biggest mistakes beginners make is trying to build a perfect loadout immediately. The best approach is to start simple and upgrade gradually.
As you gain experience, you may decide to add:
- Optics or red dot sights
- Communication equipment
- Additional magazine pouches
- Hydration systems
Upgrading over time allows you to invest in gear that truly improves your gameplay rather than buying items you may never use.
Building a Budget Loadout That Performs
Creating a professional-looking MilSim loadout does not require unlimited spending. By focusing on reliability, practicality, and a clear theme, players can assemble an effective kit that performs well on the field.
Starting with a reliable rifle, comfortable clothing, and essential gear ensures that your loadout supports both realism and functionality. Over time, small upgrades can refine the setup into something that looks impressive and performs even better. With thoughtful planning and smart purchases, any player can build a MilSim loadout that feels professional without stretching their budget.